Filet crochet bunny blanket (for a beautiful baby!)

When I found out my best friend Sam was having a new baby girl, I knew I wanted to make her something extra special. It was then that I spotted the Filet Crochet Bunny Blanket on the beautiful Instagram holly_pips (take a look – Holly’s blanket colour combos are just so dreamy!).

I couldn’t get it out of my head. I’d never tried filet crochet before, but after much deliberation I decided to give it a go. And I’m so glad I did!

Red Heart filet crochet bunny baby blanket finished project

Filet crochet, sometimes known as pixel crochet, involves working a series of gaps and blocks to create a pattern. After initially not realising I’d picked up a US pattern (so dc didn’t quite mean what I thought it meant, which almost resulted in me launching the whole thing off my balcony before I worked it out), I was soon hooking along just fine.

It’s quite a simple technique to pick up, though it’s initially a bit tricky getting the tension right and remembering to pull out the stitches to create tall enough squares. You can see at the bottom of my blanket that it got a teensy bit puckered while I was still getting the hang of it, but once I’d given the whole thing a wash it was far less noticeable! The pattern also gave me a chance to crochet my very first border, which gave the whole thing a really polished look.

For my blanket, I used Sirdar Hayfield Baby Aran in Cream. It was beautiful to work with and washed really well; it was only after I finished that I realised it definitely needed to be machine washable seeing as it was for a newborn and a busy mum, and luckily it was!

Unfortunately I never got around to taking many pictures, but here’s one that really shows off the pattern.

Red Heart filet crochet bunny baby blanket, draped over back of sofa.

And here’s one last one of a happy little me with the blanket all wrapped up just before gifting it to Sam.

Holding Red Heart filet crochet bunny baby blanket, all wrapped up!

Have you tried filet crochet? Or even this pattern? I’d love to see – if you have one, share a link to your project in the comments below!

Edward’s Imaginarium – My first monster

Edward's Imaginarium blue and yellow flipbook monster - back.

Yep. That’s right. I’m on about Kerry Lord’s lovely work yet again – and following on the success of Edward’s Menagerie and Edward’s Menagerie Birds, Kerry from Toft has brought out her most fun and creative book yet.

Edward’s Imaginarium, also known as Ed’s Flipbook, is refreshingly unique and absolutely brimming with fun. It uses a series of different pattern options for heads, arms, and feet – all of which start with the basic head and body pattern, which is similar to what we’ve come across before in Birds – that you can mix and match in a flipbook style to create a monster of your own.

As soon as I picked it up I knew I wanted my first project to be a monster for my friend Sam’s kiddo, Ernie – and I also knew I wanted to go large. So, I nipped over to the ever brilliant Knit Nottingham on my lunchbreak to grab some chunky yarn in a whole bunch of colours to give me a starting point. Then, I got sketching.

Starting out on my Edward's Imaginarium flipbook crochet monster.

In the instructions for how to use the book, Kerry encourages you to grab your pencils and sketch out how you’d like your creature to look. And while there are lots of ready-made patterns you can follow in the gallery at the back, what I love about this book is that it really encourages you to be creative and adapt patterns to fit your ideas.

I’m usually super conservative and terrified of straying from a pattern, but with this I crept out of my comfort zone and soon found myself sketching, colouring, and creating a little monster pal all my own!

Edward's Imaginarium blue and yellow flipbook crochet monster - sewing together.

I used H:2, A:10 and F:11 with a version of the three-round stripe; I followed it as normal for the body, but then stuck with my main colour for roughly 8 rows on the arms and legs before going into the stripe (as I didn’t want him to look like he was wearing a stripey onesie!). I also added a tail for a little extra sass.

Edward's Imaginarium blue and yellow flipbook crochet monster - front.

Edward's Imaginarium blue and yellow flipbook crochet monster - close up.

I’m so chuffed with how this little cutie turned out. The instructions were terrifically easy to follow, and it was so satisfying how quickly the chunky chap worked up in the weightier yarn. And while it was already great bringing something I’d dreamt up to life, it was even better seeing how pleased Ernie was with his present.

I think I’m going to cast on a knitting project next, but I can’t wait to make another little monster. Thanks, Kerry and Toft, for yet another brilliant book!

The Knitting and Stitching Show 2016

After a horrendously busy few weeks at work, on Saturday the 8th of October I crawled out of bed at 7am to head off to The Knitting and Stitching Show.

It’s ages since I’ve been to a large scale craft event  – in fact, I don’t think I’ve been to a big one since Handmade Fair (you can read my blog post about that here) – and when my friend Bex suggested I come along to London and make a day of it I jumped at the chance.

img_1023

Held at Alexandra Palace, it’s a fair of all things knitting, crocheting, and stitching. And when I say all things, I mean all things; there was even a stall selling nothing but high quality lamps to work under, and I spotted one selling just the very very poshest of dressmaking scissors.

Stalls, stalls, stalls! 

For crafty enthusiasts it was a total, sprawling haven. Popular names like Rowan and Stylecraft had big (and very popular) stalls, and there were hundreds of independent suppliers of everything from hand-dyed yarn to beautifully patterned fabric, all wrapped up in a wonderful setting.

img_1016

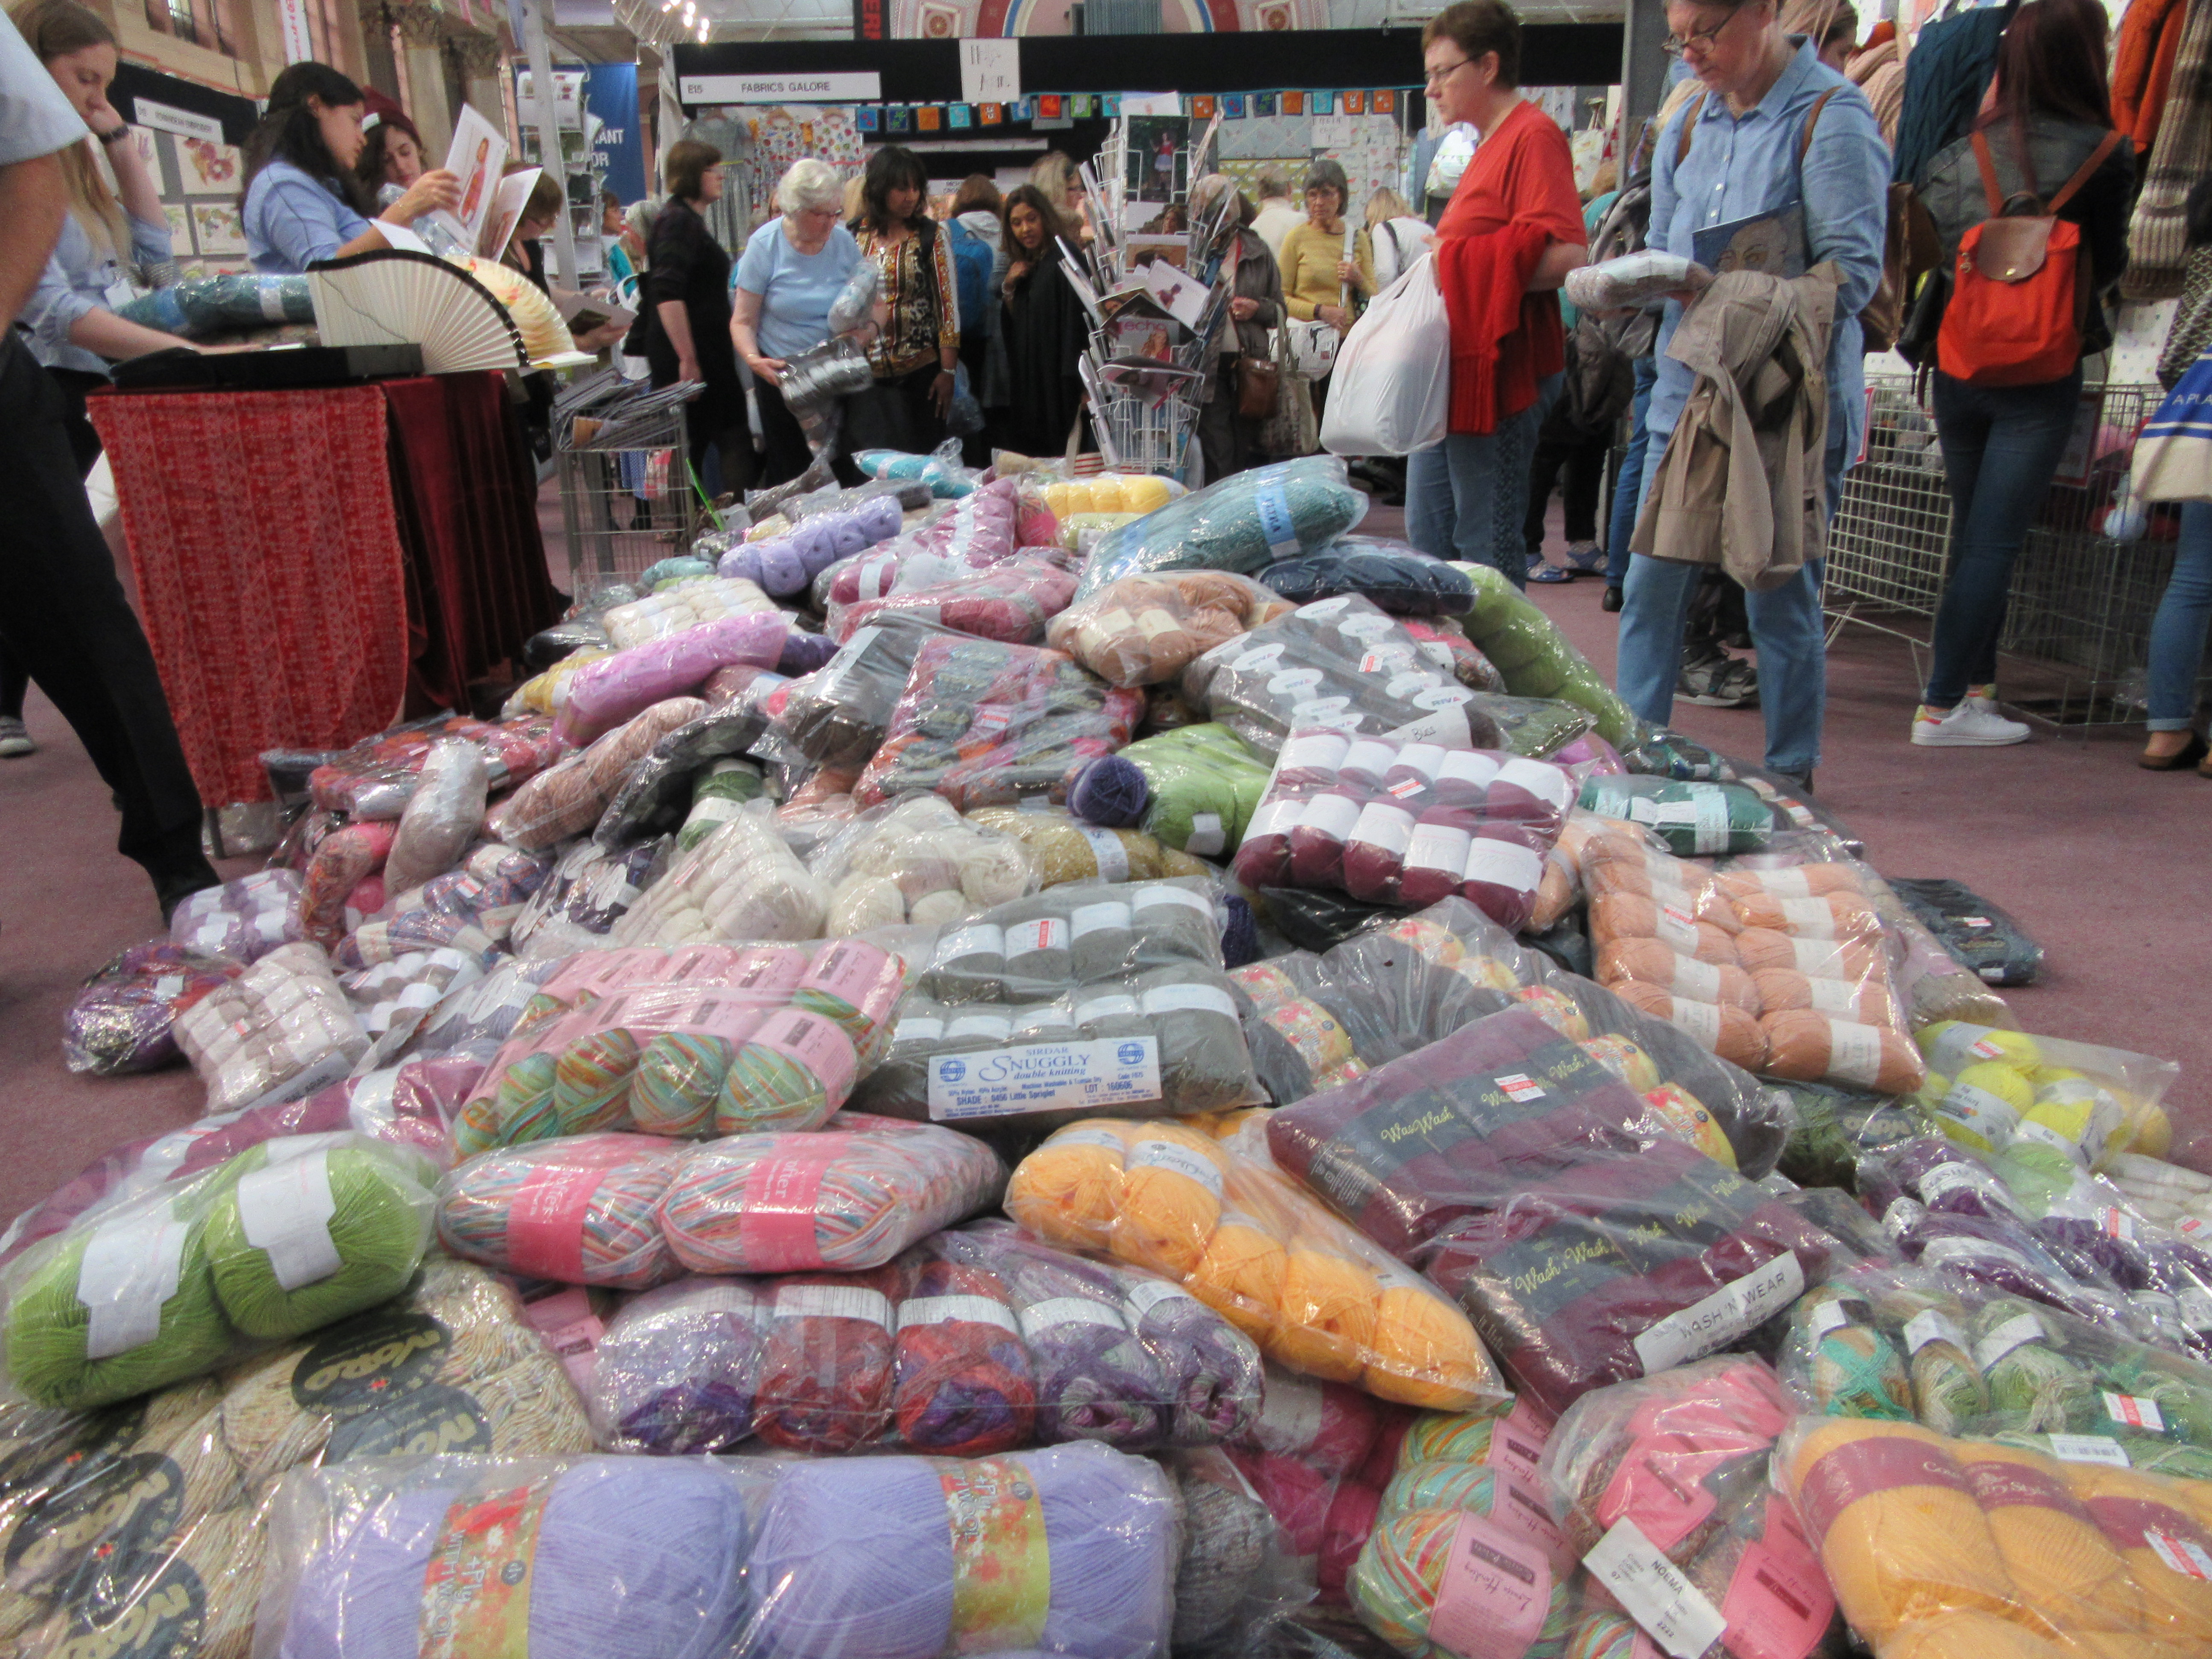
The best part, though, was the fact that the stalls suited a whole range of budgets. At some fairs like these I’ve found the focus is on hand dyed and hand crafted – so you’re hard pushed to pick up a skein of yarn for less than £8 – but while there were plenty of wonderful sellers with exactly that, there were also those like Black Sheep Wools with huge piles of discounted yarn that had everyone scrabbling for the best deal.

img_1019

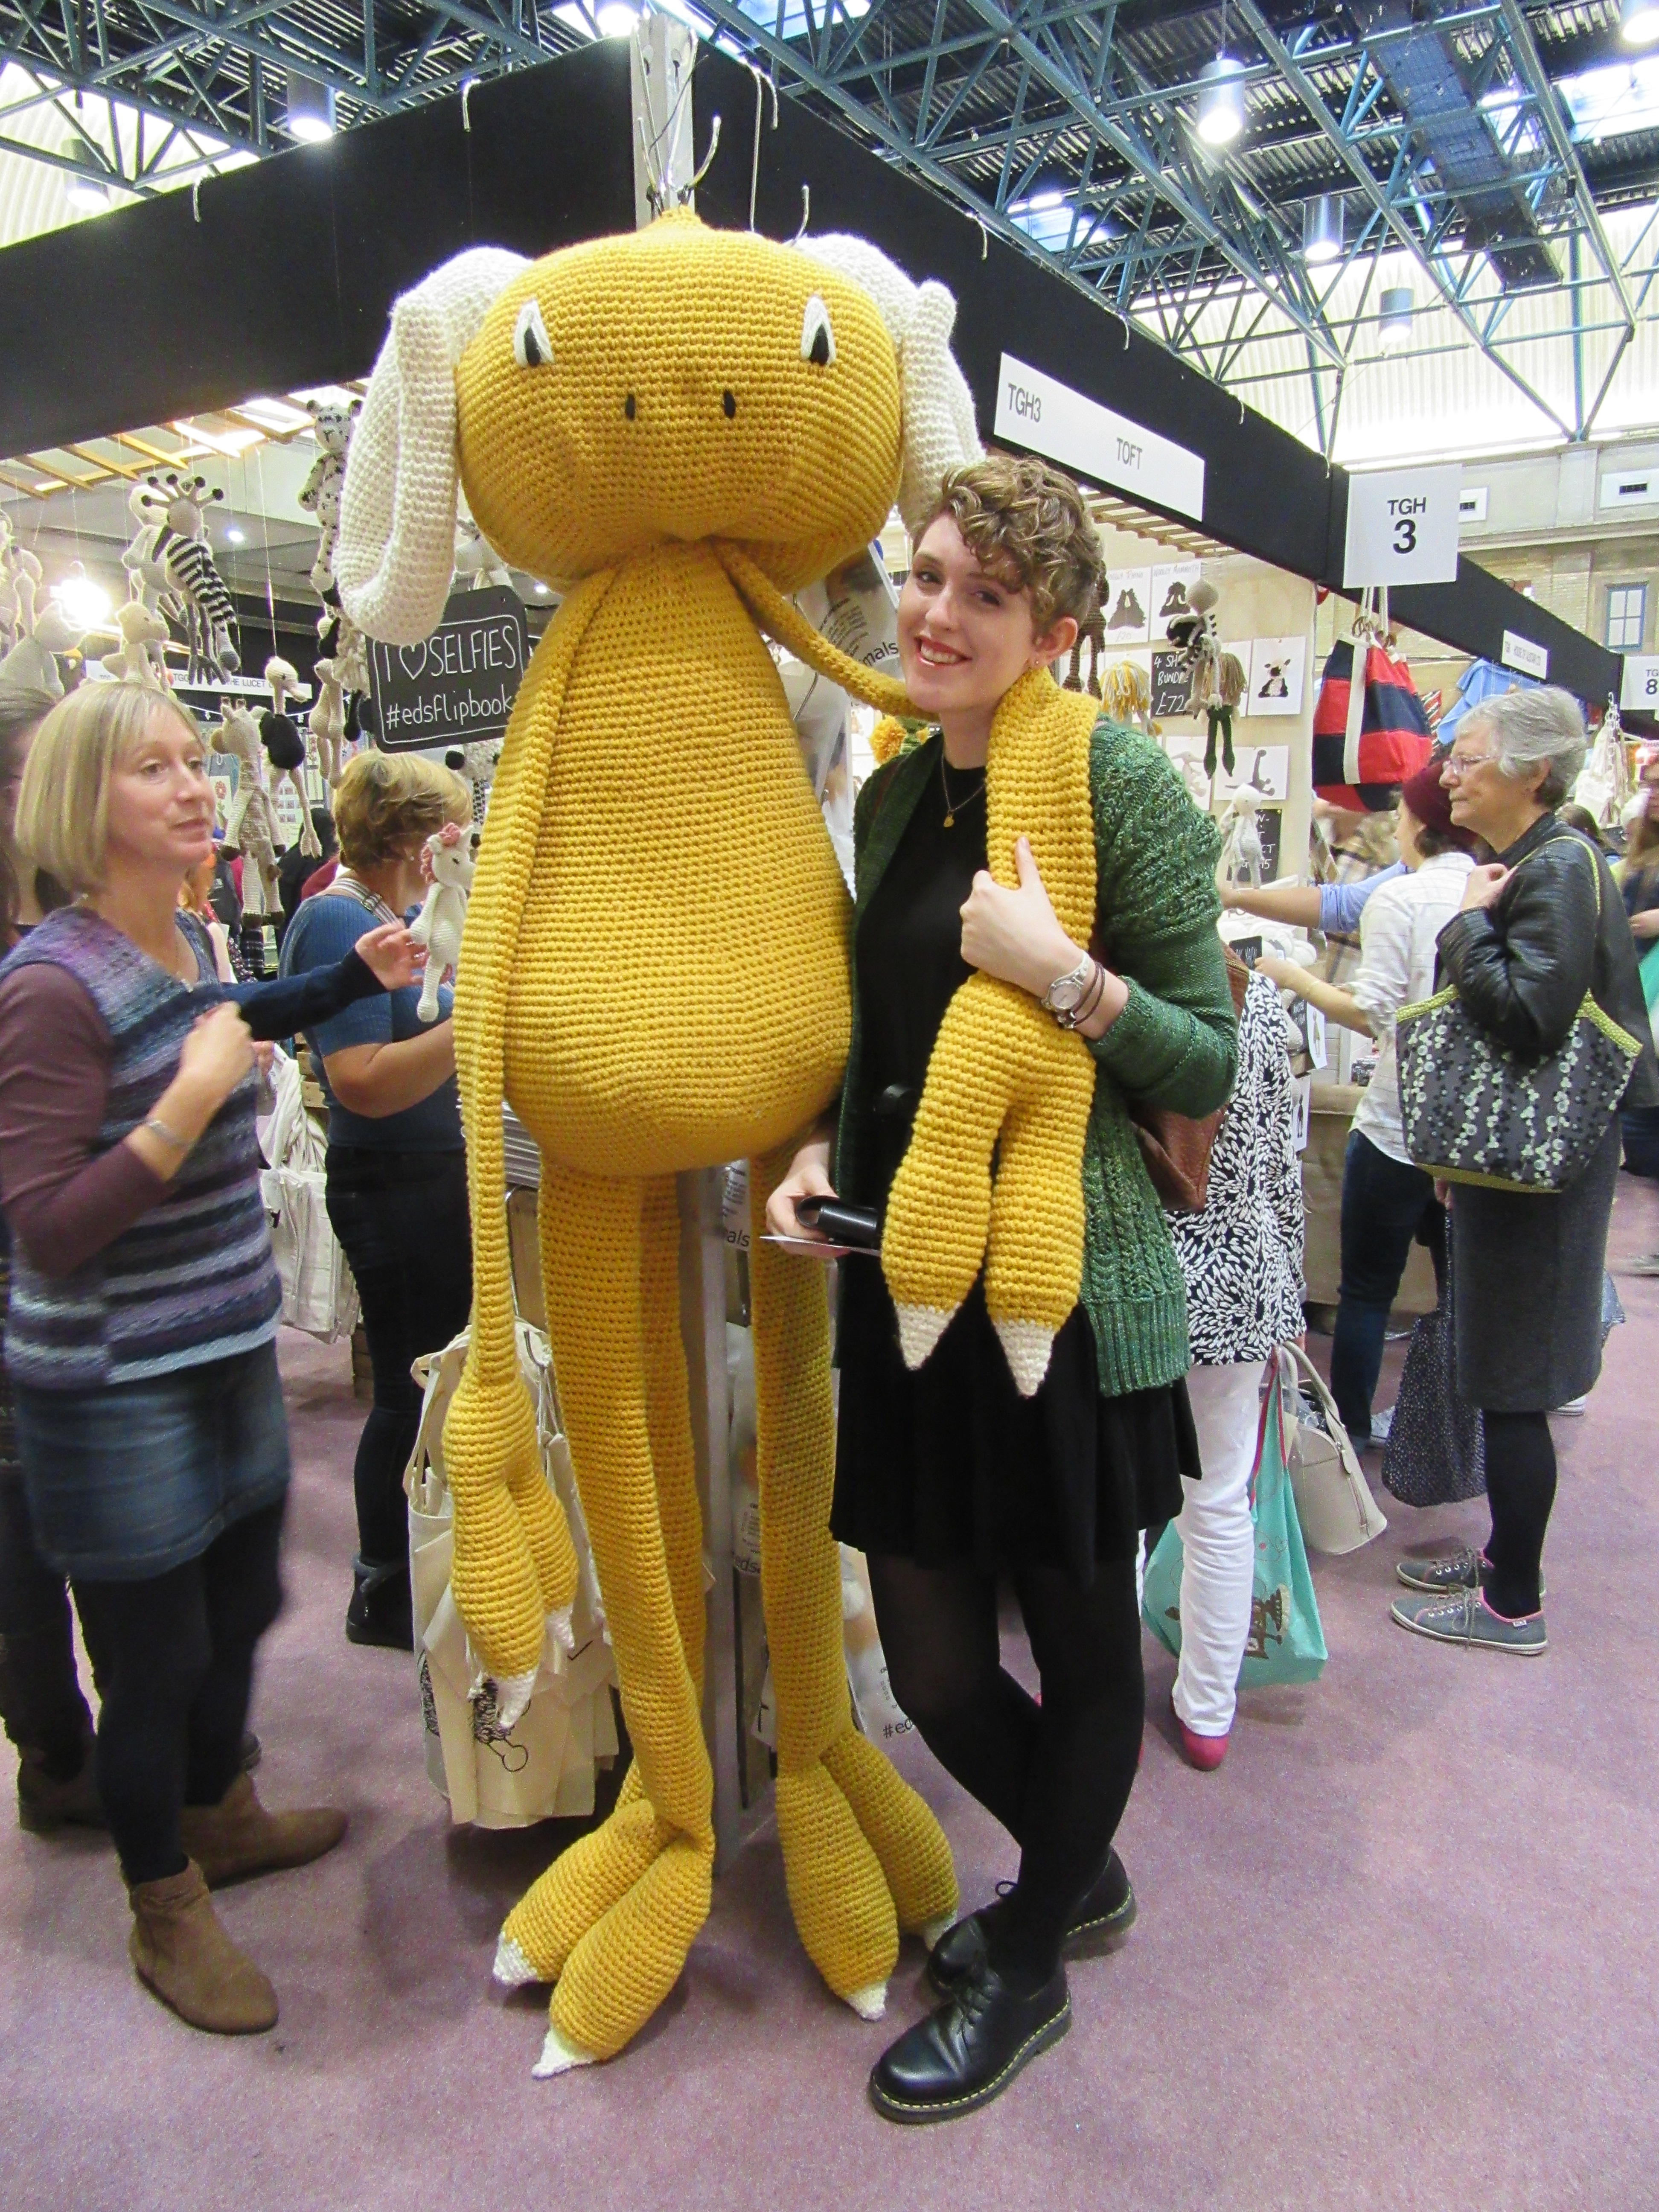
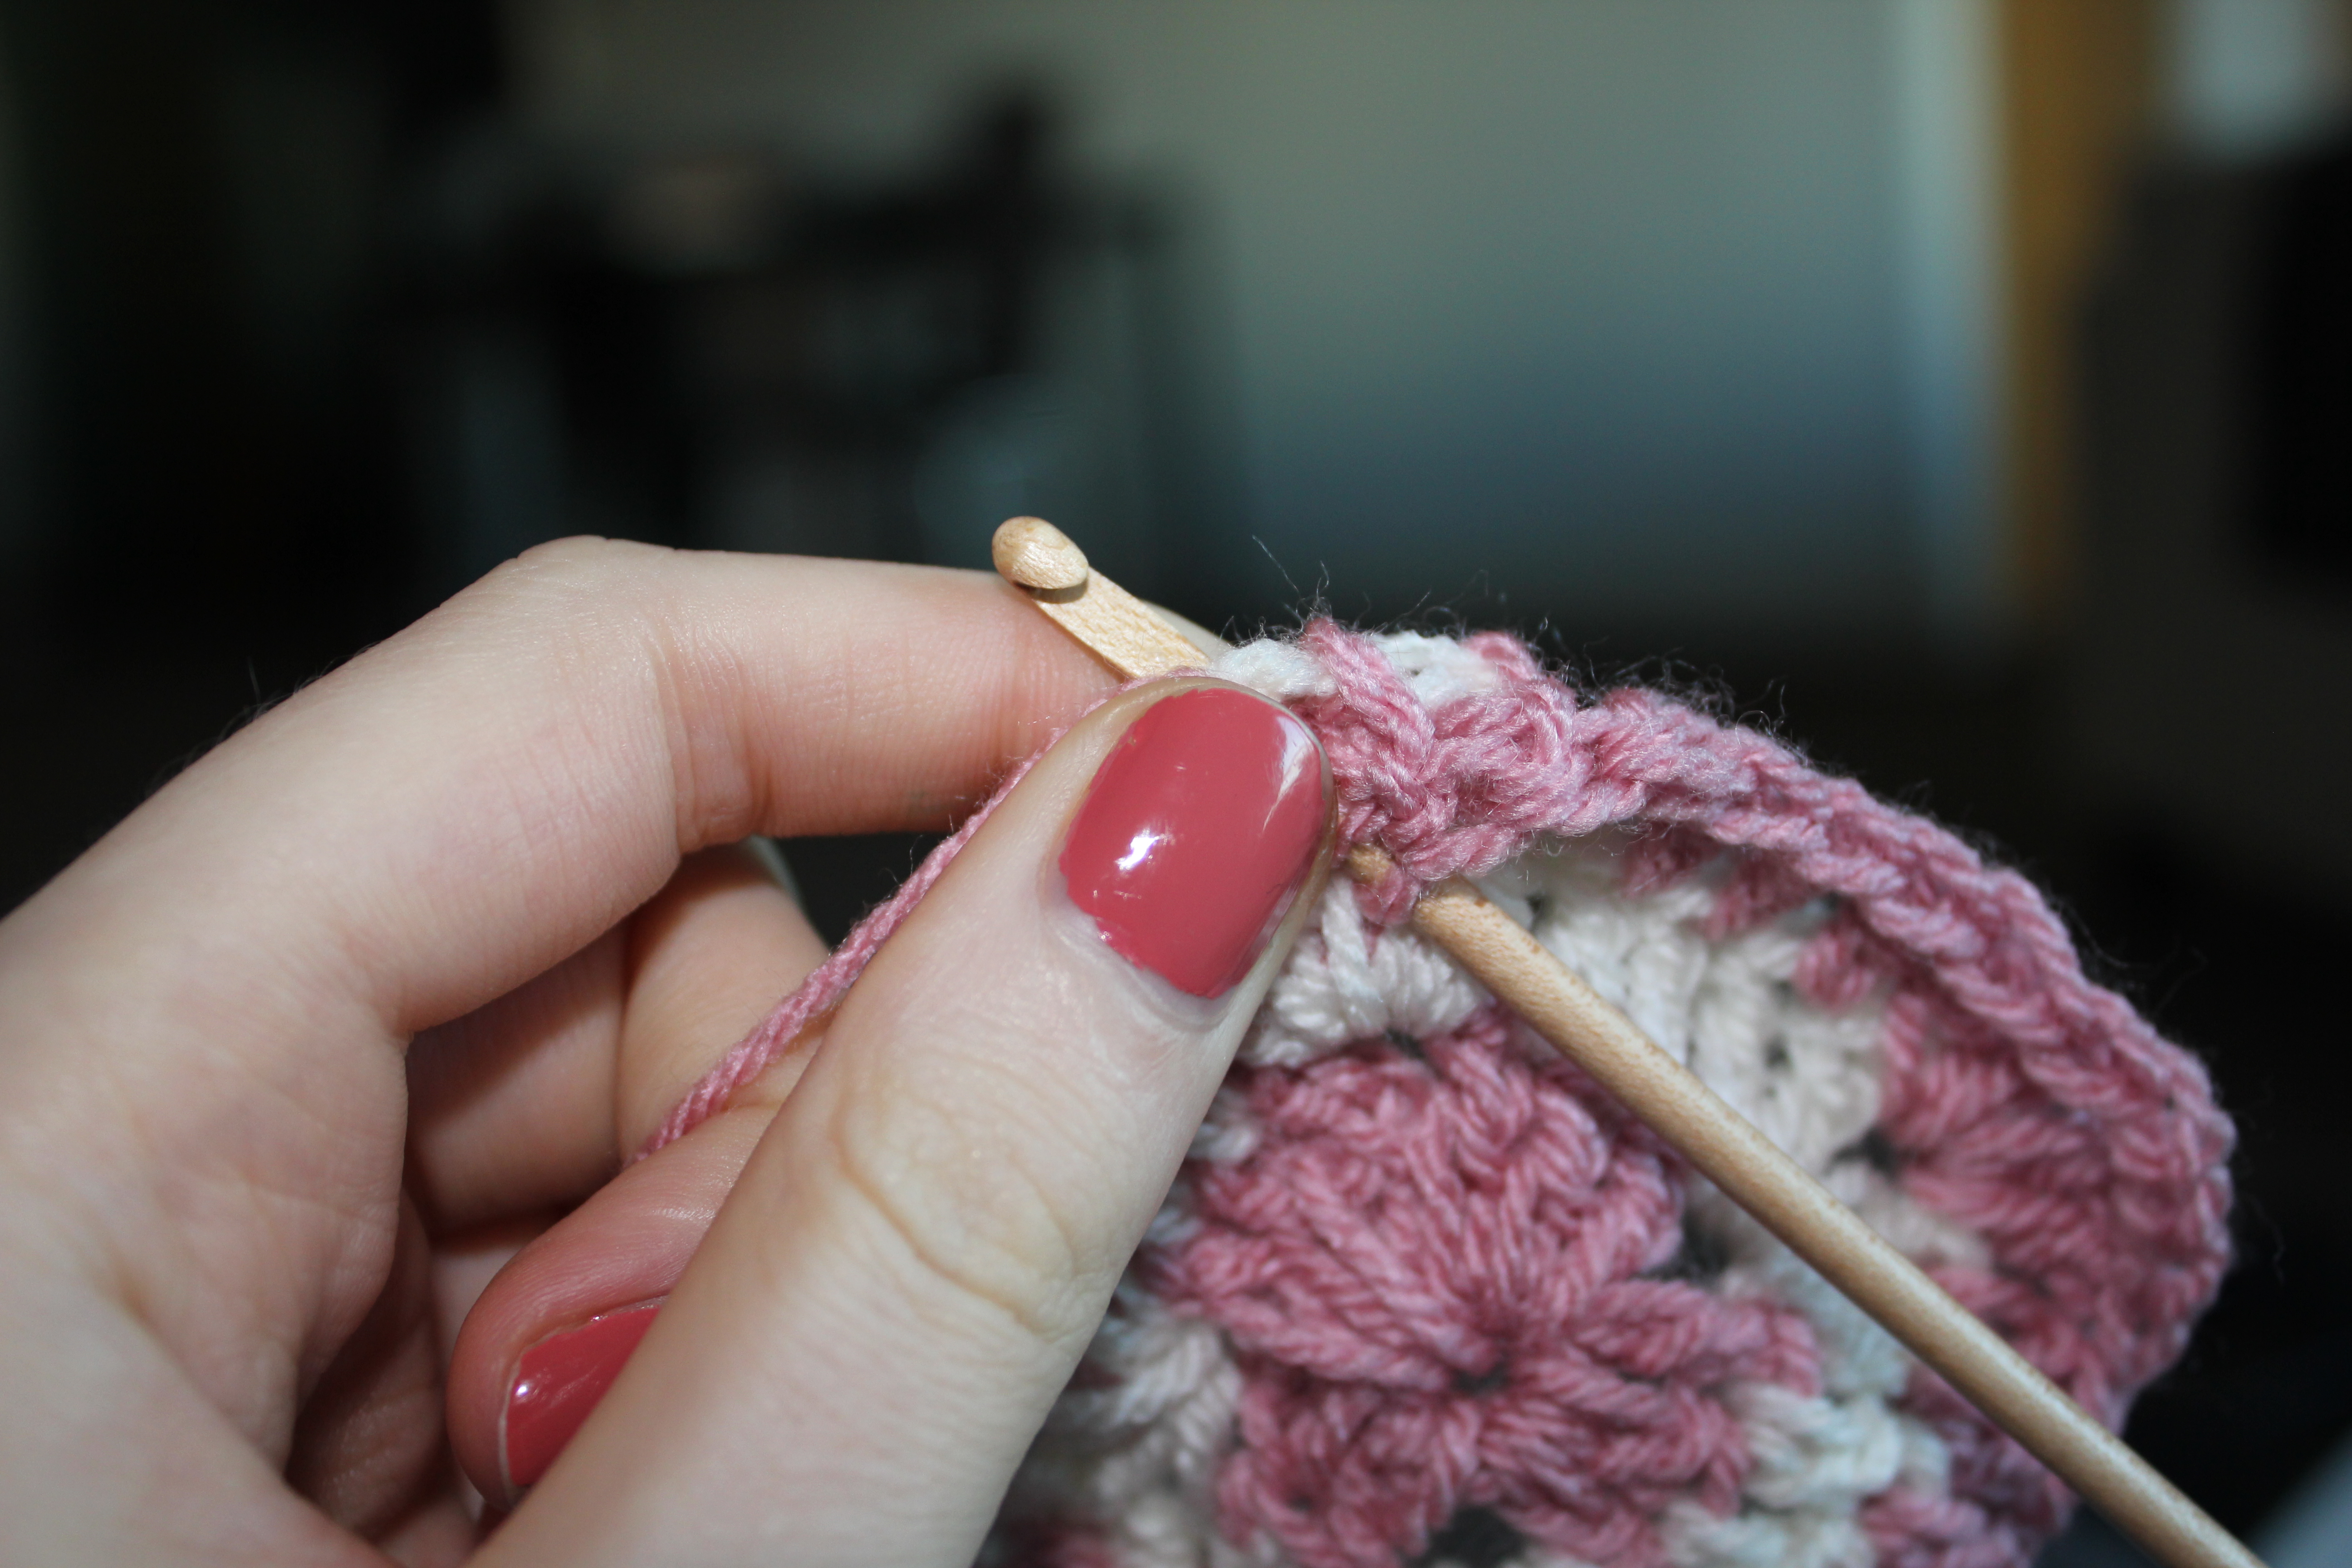
My favourite stall, though, was definitely Toft’s. I absolutely love Toft’s designs (see my posts on making Kerry Lord’s flamingo and stork) and they dress their stall so beautifully it’s impossible not to choose at least something small to take home. The girls working on the stand were so lovely, friendly and helpful, and the ginormous flamingo and monster either side with signs inviting you to take a selfie were so fun.

img_1005

They were a real breath of fresh air in a room where some of the stallholders took themselves, and their crafts, extremely seriously. I did find a few of the people on the stands were a little snobby towards me and my group of friends, and often assumed we were clueless or beginners (despite the fact that we’ve all been crafting for years, and two of us were wearing hand-knitted stuff at the event!). Mostly, though, everyone was super friendly and made us feel really welcome, and it was nice to chat to a couple of other attendees as we went along, too.

Our crafty purchases

I managed to grab a beautiful pack of Sirdar Click (in this beautiful greeny purpley colour) for just £16 from Black Sheep, while Bex took away a huge haul of £1 balls of chunky acrylic from Marriner Yarns. Lizzy also picked up a bag full of Stylecraft’s basic DK in a range of totally obnoxious colours to make a bright and beautiful granny square blanket.

One of my favourite finds was a sickeningly cute Sirdar Hayfield baby cardigans pattern, which uses the lovely Sirdar Hayfield Baby Blossom Chunky. I nabbed this plus two yarn colourways to make both cardis (and had the first on my needles the very next day).

img_1026

And of course, to take everything home in, I couldn’t resist popping back over to Toft on our way out to grab their quarterly magazine and the alpaca tote, which is printed with an alpaca crochet pattern on the back!

Into the details

Overall the event was well run. Getting there was easy – we took a train from Finsbury Park – and it was well signposted once you arrive.

The only issues I found were with the toilets and food. Toilet queues were always huge (though they had installed a few portaloos outside to help with this) and there was nowhere near enough space for people to sit and eat – but the food options available were really yummy, including pizzas and roast turkey rolls.

Tickets were about £16 each, which I think was good value. We spent about four hours at the actual fair in the end, and the venue was lovely, though with most of the workshops being another £16 or more on top of this we didn’t feel like we could afford to try any out. There were lots to choose from, though, if you prefer going to these kinds of things to learn a new skill; if I’d had the cash, I probably would have gone for one of the needle felting classes.

So, all in all it was a fantastic day. If you’re worried you missed out, don’t be – there’s another show in Harrogate at the end of November, which is also such a beautiful place to visit around Christmas. Snap up your ticket, and enjoy!

Crochet Planter

Crochet Planter

I’ve got a lot of time on my hands at the moment (and also a lot of things going round in my head!) and, although I didn’t realise it straight away, what I needed to take my mind off things was a new crochet project that was quick and easy. Modern Crochet by Molla Mills provided me with a project that was just that.

Ok so I have to admit, Modern Crochet was actually a book I purchased for Soph for her birthday however due to a slightly embarrassing error on my part (which I will explain fully in a joint post Soph and I are planning to do) I ended up with a copy too. The book itself is gorgeous (!) and Soph and I are planning to review it soon (watch this space guys!) but in the meantime I’m going to have to tell you about the lovely crochet planter I made from the book as I literally cannot contain my excitement about it!

Modern Crochet

So the project itself was for a basket, not a crochet planter, but as soon as I saw it I instantly thought with a slight adaption it could provide me with beautiful little crochet planters to put my herbs in! I know, maybe this wouldn’t have been the first thing to spring to mind for most, but I love herbs and have been intending to make some cute little planters to put my beloved basil, flat-leaf parsley and thyme in for a while. Herbs are so important they deserve lovely little pots to sit in right?!

Unlike other projects this one used rag rug yarn and a large 9mm hook. I’ve never crocheted with thick yarn or a large hook so after purchasing both from my lovely local store Wool on the Exe (which I promise to write about soon!), I was more than excited to set to work. 3 hours and a slight adaptation later and I was sat there staring at my first crochet planter feeling super smug.

crochet planter 5

Crochet planter 1

The project was easy to follow and because it was using such thick yarn it came together really quickly giving me instant satisfaction (ideal!). The resulting pot looks great and as well as giving my basil a bit of street cred and it also made me spend some time relaxing and focusing on something I enjoy (rather than ruminating on the difficulties in life!). Maybe I should make one of these bad boys every weekend?!

Crochet planter

Edward’s Menagerie – Ina the Stork

Funny-looking birds and cute handmade toys are pretty much two of my main jams, which is why I specifically learnt to crochet to make Toft’s Sophia the Flamingo.

Anyway, as I mentioned in my flamingo post, I was lucky enough to get the Edward’s Menagerie: Birds book for Christmas, and I only managed to wait until Boxing Day to jump onto Wool Warehouse and order yarn for my next bird.

Rather than get ahead of myself (something I’m kind of known for doing), I sensibly decided to stick with Level 1 birds, which use more basic crochet skills. There are so many beautiful patterns even just in that section, but I decided to make Ina the stork; I loved the contrast of her white feathers with her super bright orange legs. And look how she turned out!

In situ shot of crocheted Ina the Stork from Edward's Menagerie.

As far as yarn was concerned I needed something fairly inexpensive with vibrant colourways, and Cascade 220 Sport looked just right. When it arrived the colours were fantastic and I found it easy to work with. That said, despite having absolutely no problems with the skein of white yarn, the orange came apart and got nightmarishly tangled, so if you do use this yarn – be careful! In the end I had to just gradually unravel the whole thing and roll it back up into balls.

Side view of crocheted Ina the Stork from Edward's Menagerie.

As with the previous bird, the pattern was really easy to follow. The only thing I had trouble with (which you can’t really see here) was the tail, through my fault rather than the pattern – I still just haven’t quite nailed splitting rounds, but hopefully I’ll work it out next time!

Also, I think I might have slightly overstuffed the head and body, as she looks a tiny bit bloated. But otherwise, I’m really pleased with the result – especially the hilariously bright, wiggly legs, for which I used learnt a new technique to crochet a tiny fourth claw.

I’m taking a little break from crochet now to work on some knitting projects, though I did already order the yarn to make a bright yellow canary. When I’ve made a couple more, I’ll definitely be posting a full review of the book itself – so keep an eye out.

I’ll leave you with a final picture of adorable Ina. Let me know if you decide to give any of the Toft patterns a try!

Close up of crocheted Ina the Stork from Edward's Menagerie.

Edward’s Menagerie – Sophia the Flamingo

Back in the autumn, you might remember I posted about my sudden determination to learn to crochet as a result of this mad little project by Toft Alpaca Shop.

Well, after a few months on and off crocheting (mixed in with my misguided attempt to knit an advent garland, but that’s a stressful story better left untold) I finally sat down and finished the Sophia the Flamingo kit – and I’m so pleased with how she turned out!

Front view of Sophia the Flamingo, a crochet bird from Edward's Menagerie.

As a beginner to crochet, having only messed about with granny squares as I mentioned in my previous post, starting with a project like this was a little risky; after all, I was going from a few shaky squares straight up to shaping my very own bright pink, lanky toy bird.

With Toft, though, I needn’t have worried. The instructions were really clear, and they referred me over to the shop’s brilliant instructional videos on their YouTube channel for help when I got stuck. The videos were extremely helpful, and I found myself using them a lot to make sure I got things right.

I did stumble across a few issues, though. Being a crochet newbie my tension was awful at the beginning, meaning the head and body turned out smaller (and the neck shorter) than they should have been, and the first leg ended up with a teeny tiny foot. Luckily, after these parts I realised I needed to loosen things up a little. I also really struggled with counting the stitches when working with the black yarn, leading to a few pretty wonky toes!

Ultimately, though, I’m delighted with the finished project and am really pleased I decided to order the kit. It has everything you need, Toft’s Alpaca yarn is beautiful and bright, and it all comes wrapped up in a lovely drawstring canvas bag (which makes a great project bag).

Oh, and this is just the beginning for me and Edward’s Menagerie – my boyfriend picked up on all my (repeated) hints during December and fixed me up with the full book of patterns for Christmas. I’ll post a proper review on the book when I’ve made a few more birds, but it seems great so far!

Thanks, Toft, for inspiring me to pick up a new craft – and for giving me the means to fill my apartment with silly birds.

Side view of Sophia the Flamingo from Edward's Menagerie.

Crochet for beginners

The other day I found myself cooing over the patterns and kits over at Toft Alpaca Shop for the thousandth time, and this totally mad crochet flamingo finally tipped me over the edge. I had to have it. And I suddenly thought – why not just learn how to crochet? So, I did!

I already had a crochet blanket kit that I picked up at last year’s Handmade Fair, so I had everything I needed to get started when I had an afternoon to myself. Unfortunately, two hours in and four tries later, it seemed the kit wasn’t quite right for beginners – and I was ready to launch my crochet hook out the window.

Luckily, a little Googling the next day turned up this brilliant tutorial for simple granny squares on the blog Little Tin Bird. Heather, the blogger behind the site, explains every single step carefully with some extremely helpful pictures.

I had the right yarn and hook to give it a go, so I sucked it up and gave it another try!

IMG_7949

With this pattern, I practiced chain stitch, treble stitch and slip stitch. After how much I’d struggled with the other pattern, I can’t tell you how happy this tiny, pretty wonky pink square made me feel.

IMG_7950

I also learnt how to change my yarn colour.

IMG_7951

IMG_7952

IMG_7953

And, just like that, I had my very first granny square!

IMG_7955

It’s uneven, lumpy and a little sad looking in places, but I don’t care – I’m so delighted with how it’s turned out, and can’t get over the simplicity and helpfulness of the walkthrough on Little Tin Bird. If you’re thinking of giving crochet a go, it’s a fantastic place to start – I definitely recommend it!

Next, I think I’m going to make a bunch more squares to practice each technique. It’s so fun to be learning something new, and while I’ve a habit of trying to run before I can walk I really want to slow down and get my head around the basics.

If you have any beginners’ crochet patterns you’d recommend, let me know. I’d love to give them a try!

Home alone

IMG_3544

A couple of weeks ago I was left … home alone. Now although I don’t usually get up to the kind of antics Kevin McCallister would get up to when left to my own devices, I don’t usually fair well. Usual home alone activities involve sitting, eating lots of cereal, moping around and more sitting. I don’t know why I do it but there’s something about James not being around (don’t get big-headed about this James!) that makes me feel a bit glum and like there’s not much point in doing … well, anything.

The other week was different though. The other week I managed to buck the trend. Ok, it didn’t start well – I decided to bike to work thinking it was sunny only to turn up to work drenched, grouchy and late – I vouched to pick myself up though and get on with stuff and that’s exactly what I did. Most notably, I made some progress with my crochet blanket, so much so that I now have six complete squares! Six! Yes … there’s still a fair few more to go before I can make my lovely throw … but every single square feels like a mini achievement so imagine what I’m going to feel like at the end!

crochet squares2

crochet squares1

Oh and the productiveness didn’t stop there (that’s right, hold on to your hats guys!), I also managed to get started on painting the living room door! At the moment, all the doors in the house are looking rather sad, having been unsuccessfully stripped of their previously painted exterior. And if the remaining specks of paint are anything to go by these doors have been through some rough times. Greens, purples and blues (and not nice ones at that) – we’ve decided a classic white might make them feel a bit happier. So, sand paper and paint brush at the ready I made a start and they are already looking much more classy!

brush

So all in all I had a pretty productive week despite the fact that I was home alone (yay!). Fingers crossed, my new productive attitude is here to stay – with James off again next week to do a couple more lovely wall murals we’ll soon find out …

Two squares are better than none

Crochet

As I mentioned a couple of weeks ago, I have finally decided to take on challenge of crocheting a blanket of loveliness! (Yay for me!). To do this, I purchased a great little crocheted blanket kit from Sconch which contains a pattern, wool and the immense power to make you believe that you can make a crochet blanket and it is going to be super quick and easy (just what I needed!). So, progress so far? Two and a half squares crocheted and complete series of Our Girl watched … pretty good going … kind of …

IMG_3319

The pattern itself (or for the squares at least) is super simple, involving chains, half trebles and double crochet (what could possibly go wrong?!) however, at times, the instructions appear a tad awkward/clumsy to follow. Once you’ve figured out what you’re doing though you’re soon throwing out squares like some kind of pizza delivery kid and admiring them as you do so, perfect!

tea and crochet

IMG_3390

Although I’ve only crocheted a couple of squares so far and I’ll admit, the chances of finishing said blanket before the end of the year look slim, I’m still pretty content. After all, two squares are better than none.

Is anyone else crocheting a blanket at the moment and if so, how’s it going? I’m guessing putting all the squares together is the difficult bit …

A rainbow of crochet hooks

IMG_3266As I’ve mentioned before, I do love a bit of crochet but I must admit, for quite a while now I have only been the owner of a few crochet hooks. Well as of today that has all changed – say hello to my new rainbow of hooks!

In all different sizes and colours my new little set of friends were criminally cheap … a mere £2.25 for 12 from amazon, bargain! And from what I can tell, although they are not made from unicorns’ hair or phoenix feather, they are going to do the job.

IMG_3276

IMG_3277Multiple crochet hooks in hand, now I have no excuse for not starting my next crochet project which will be … (drum roll please) … a blanket! I’m so excited it’s unreal. I’ve wanted to make a blanket for quite a while now but have always felt daunted by the amount of wool I would need to buy and how expensive that would be. Imagine my delight then when I met a lovely lady from Sconch at the Handmade Fair the other weekend selling crochet blanket kits! The kits themselves contain a crochet blanket pattern, designed by Sconch, and all the wool you need to create a beautiful throw of snuggliness. I’ll post again soon with details on how it’s going – watch this space!